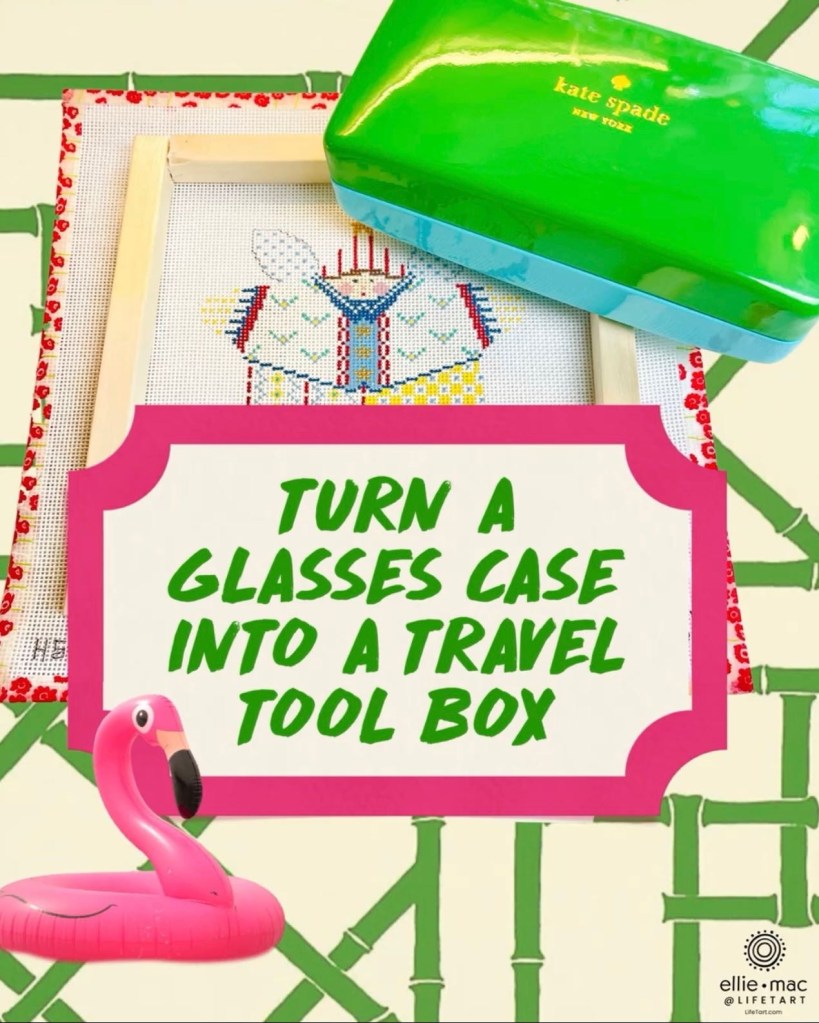
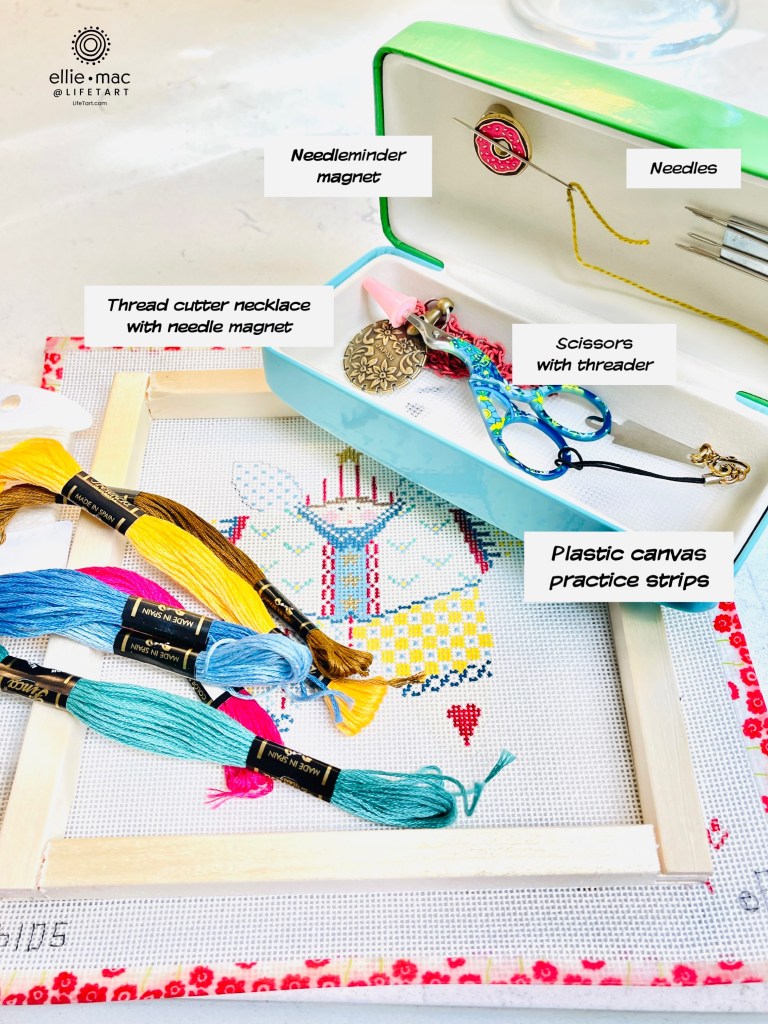
Have case, will travel!This case is large enough to carry all tools AND thread!
You know those GIGANTIC glasses cases that come with glasses – the cases that are the size of a small evening clutch? Well, those thingsare metal – and magnets stick to them..and they make fantastic travel tool cases for traveling with needlework, beadwork, etc! All you need is a glasses case/box, some magnets and of course your tools and supplies!
Super easy, super fast and something everyone who has a window sill can enjoy! A link to the video of how to make this is at the end of the post – enjoy!
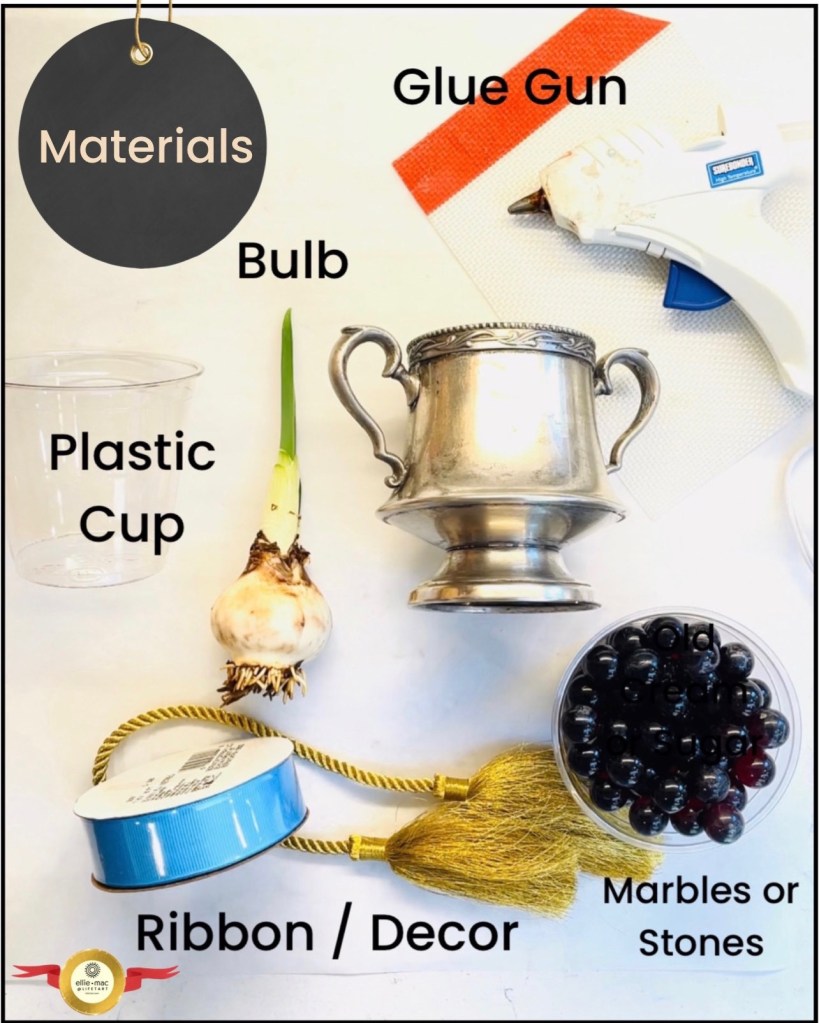
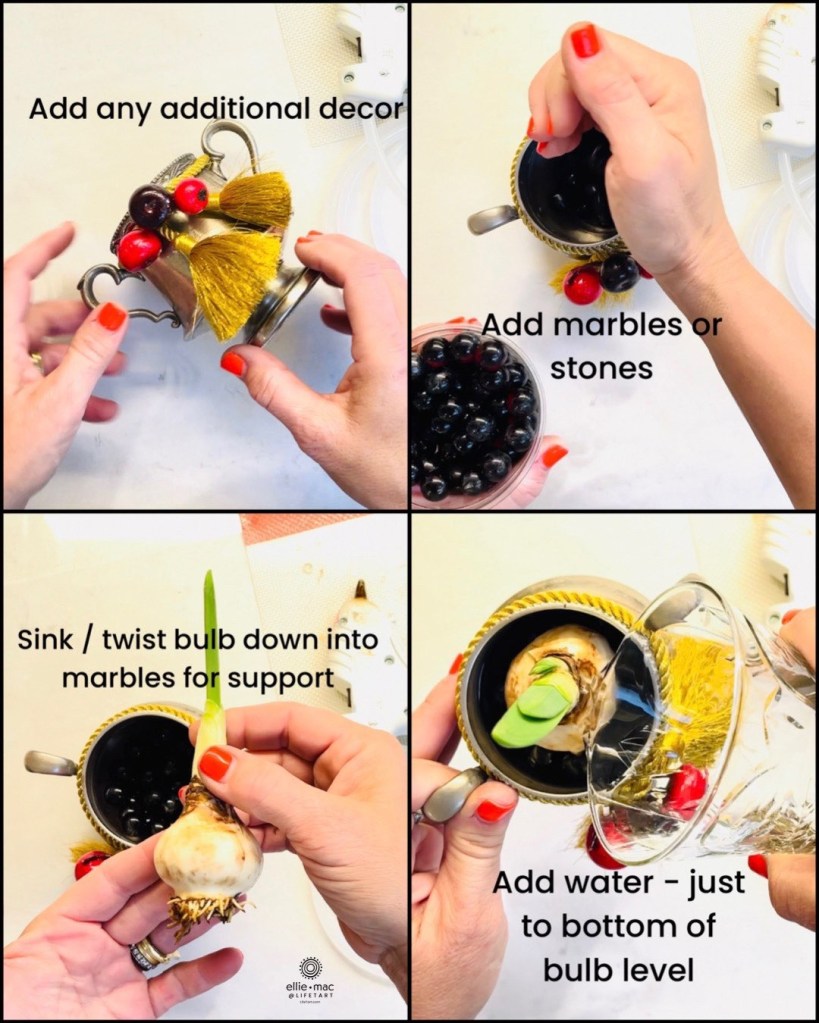
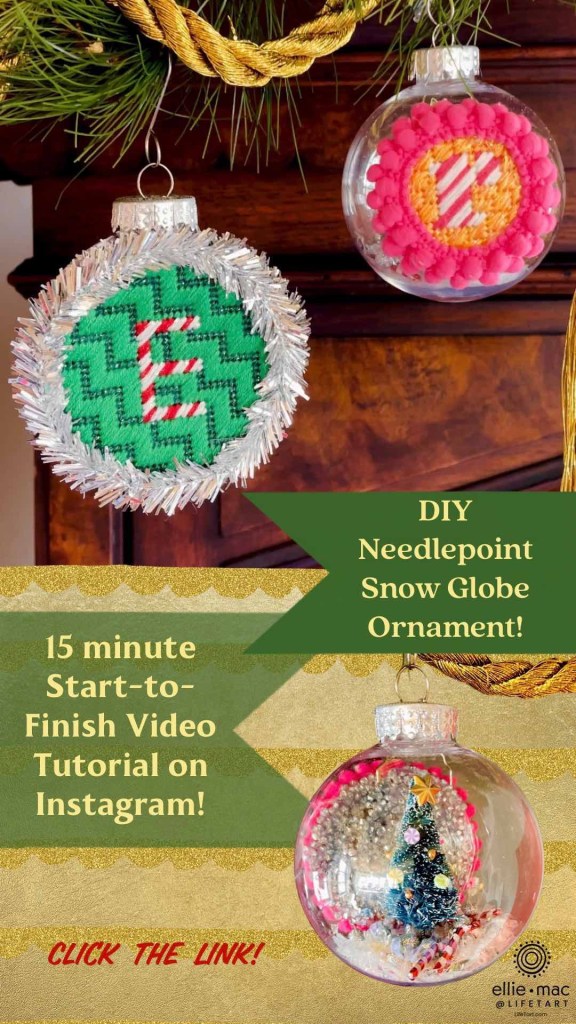
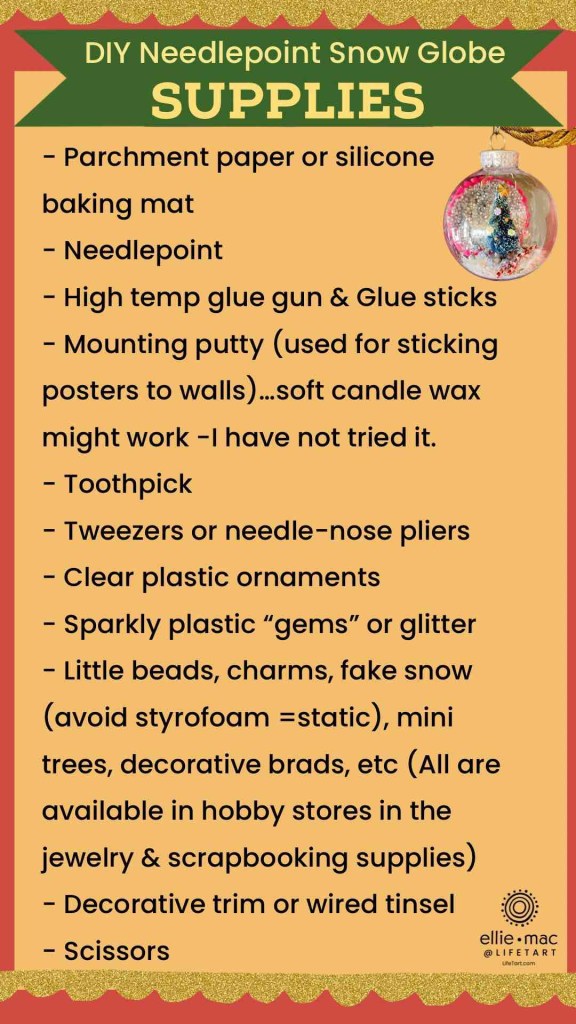
While it may look like I’m wandering aimlessly through the craft store…I’m actually gathering bits, bobs and tiny packets of “information” ….they all came together in this little ornament design! An easy and fun holiday craft, these ornaments are great even without the Needlepoint! If you are making these with kids, be careful with the glue gun and hot glue!! A click on the photo to watch the 15 minute start to finish video tutorial on Instagram!
Click to watch the tutorial video on Instagram @LifetartAll of these items are available at local craft stores
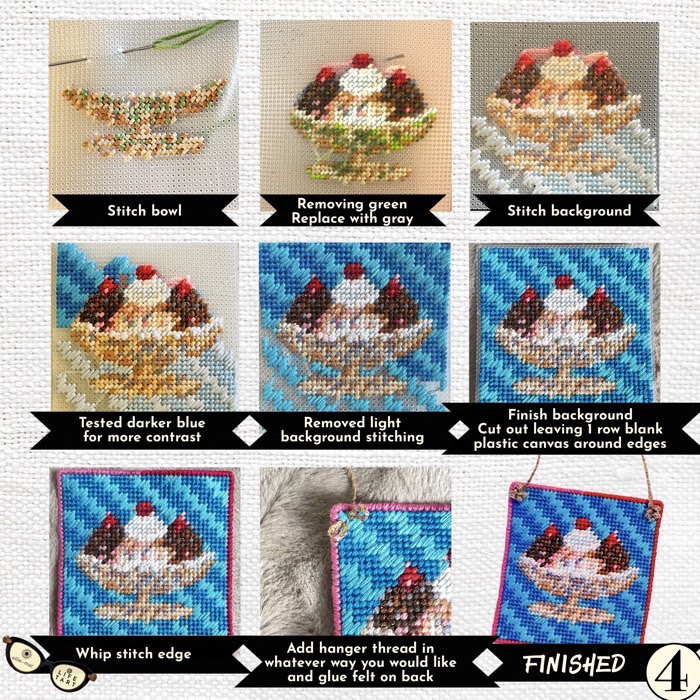
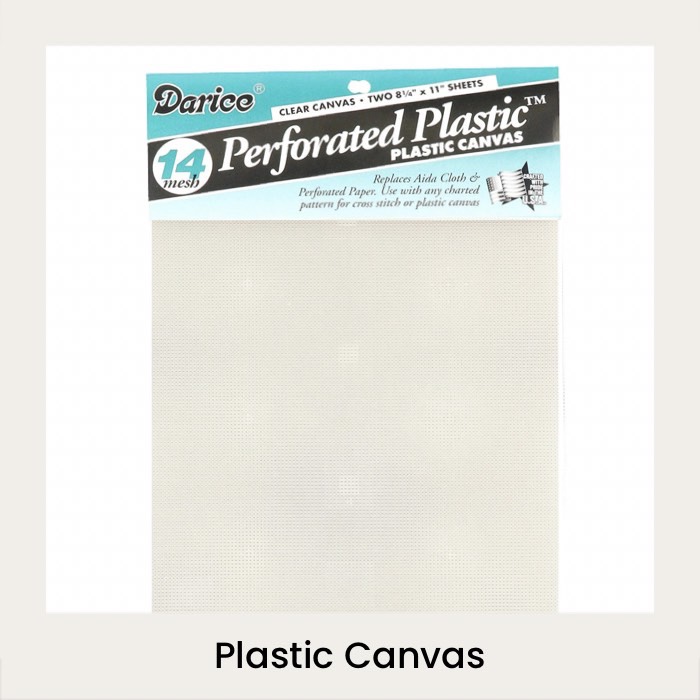
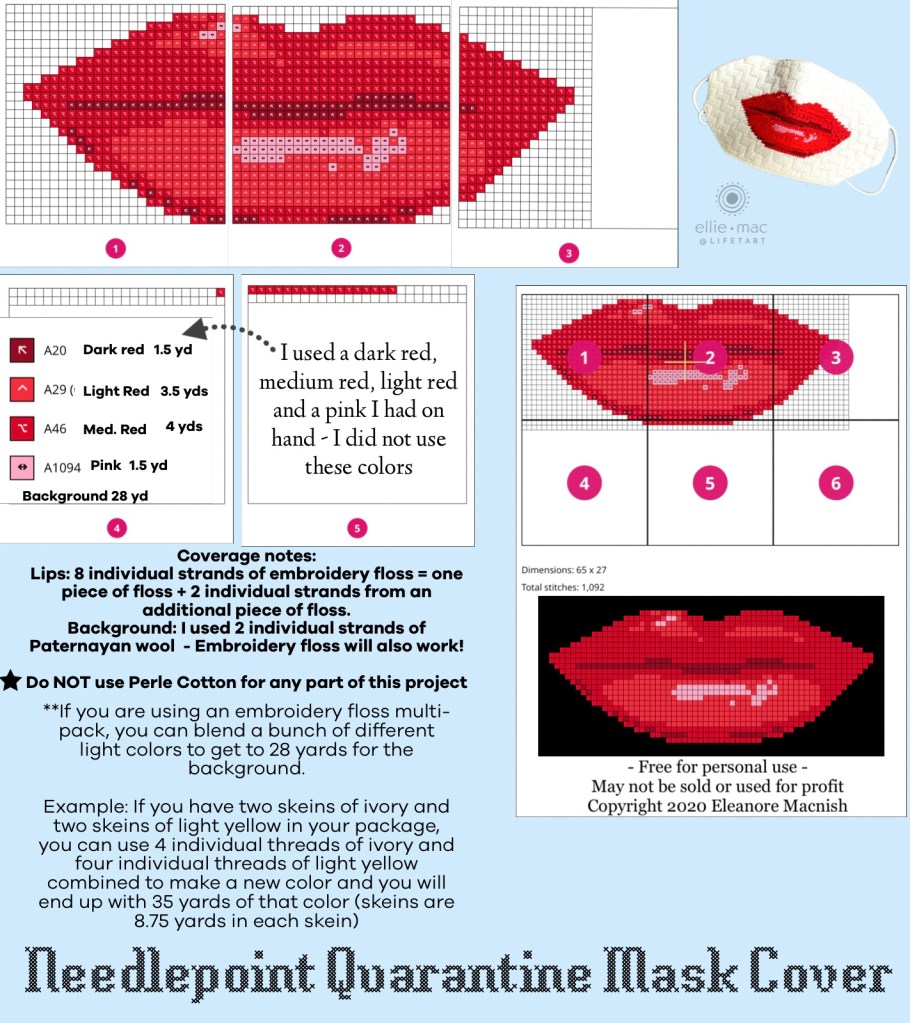
Anytime you see a mosaic made from square tiles laid out in a grid, you are looking at a charted Needlepoint design just waiting to happen – follow the steps below to stitch mosaics into needlepoint on any iPhone/iPad. This little ornament was made with embroidery floss, wool and 14# plastic canvas. A link to buy the plastic canvas is at the end.
How MOSAIC NEEDLEPOINT came about…..
My child recently spent a gap year in NYC….as a result I spent a lot of time in NYC “Checking In”….and a lot of time in LaGuardia airport.
LaGuardia airport has enchanting mosaics ALL over the airport…when I see mosaics, I see charted needlepoint designs…so I took lots of pictures.
When the time came to move said child out of their NYC digs, it was a bit of a “project” shall we say…the apartment was a sea of clothing, various collected “treasures”, Cheetos, luggage, boxes and needlepoint supplies scattered ALL over the apartment – I found thread in kitchen drawers…why one would keep embroidery floss with spoons and forks is not for me to know…I posted a 5 part Instagram series called “NEEDLEPOINT STONE SOUP – A Cautionary Travel Tale” detailing this expedition here
As we cleaned and packed, I scavenged thread, needles and canvas from all over the apartment and amassed quite a cache of supplies. Upon returning to my hotel room, I realized I could use some of the thread to rework part of a canvas I had brought on my trip.
What to do with the rest? Since I had gone as far as possible on my reworked canvas, I decided to give the LaGuardia Airport Mosaic photos a go…just to see what would happen…this sweet little ice cream sundae Needlepoint ornament is what “happened”.
Mosaics can be stumbled upon while out and about, but they can also be found online by searching phrases like “square tile mosaics” “square mosaic patterns”, etc. Pinterest is a wealth of inspiration as are tile manufacturers websites.
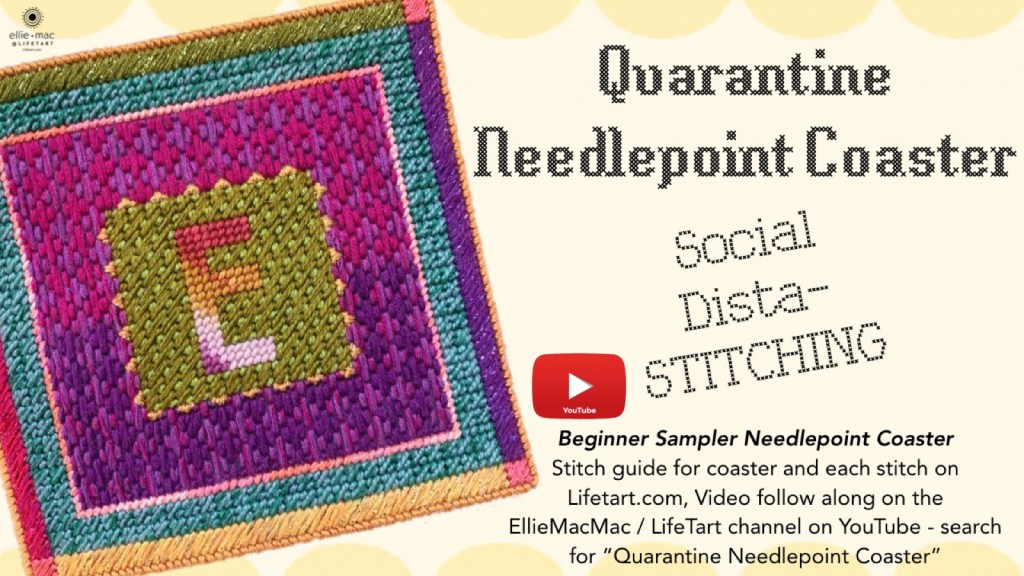
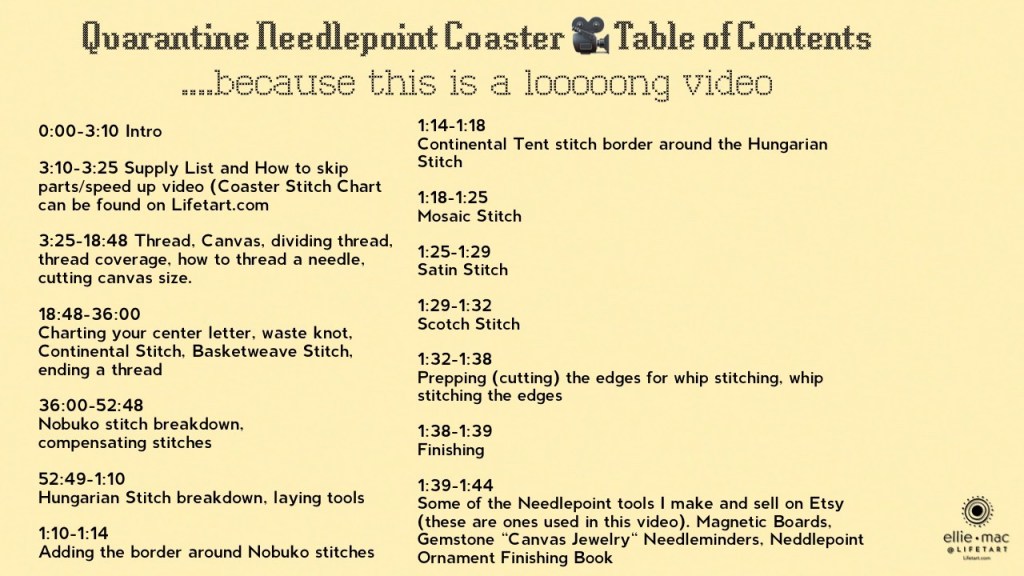
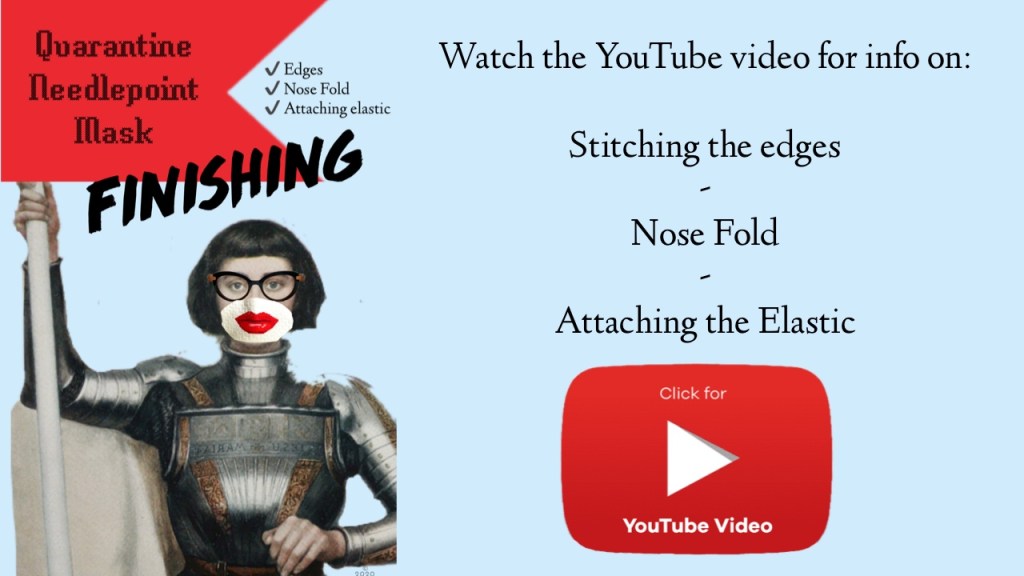
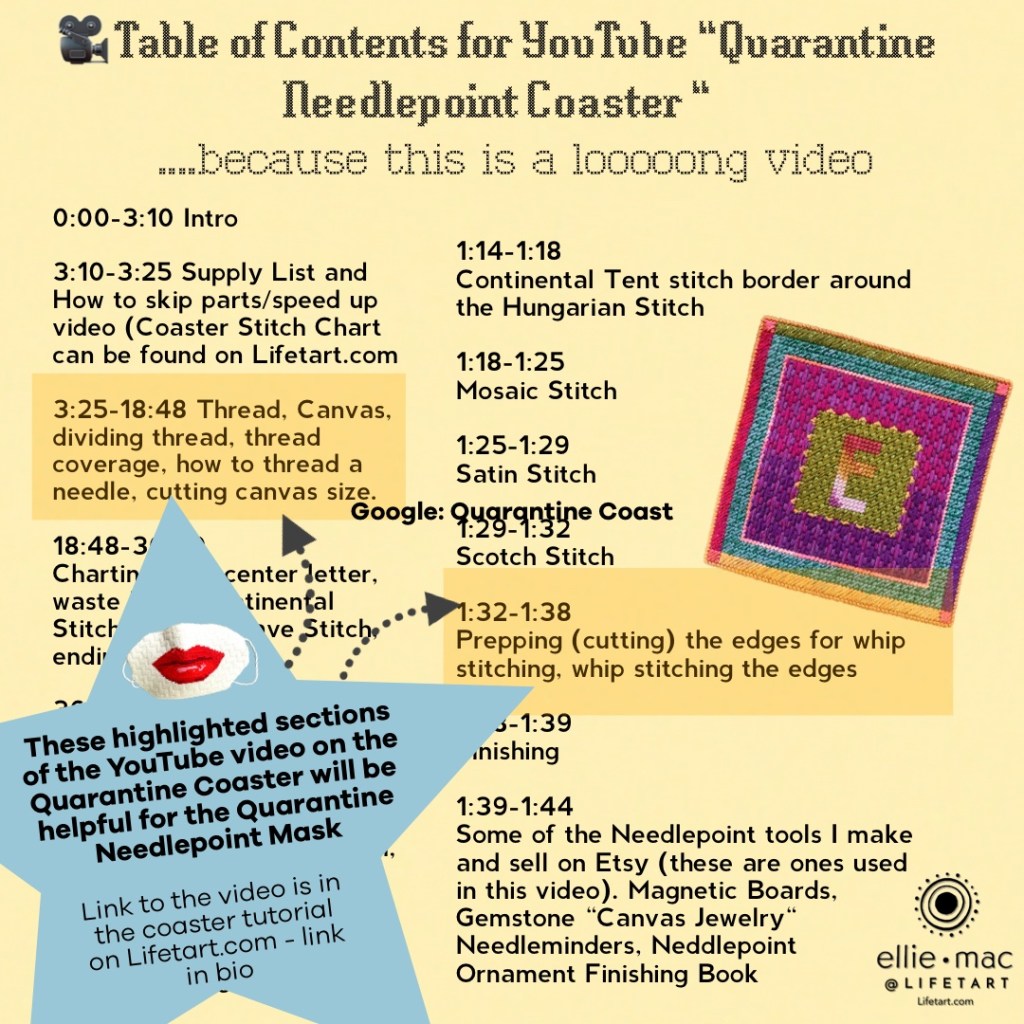
Click on the above photo to see the YouTube video – there is a table of contents belowThis guide to what appears where in the video is also in the description under the video on YouTube (click the little black triangle under the bottom right corner of video)
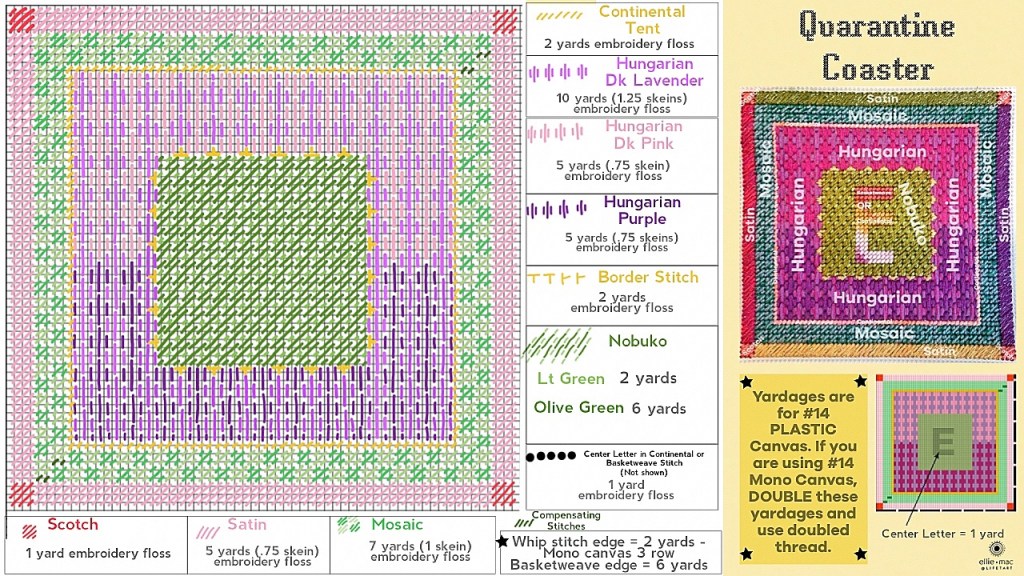
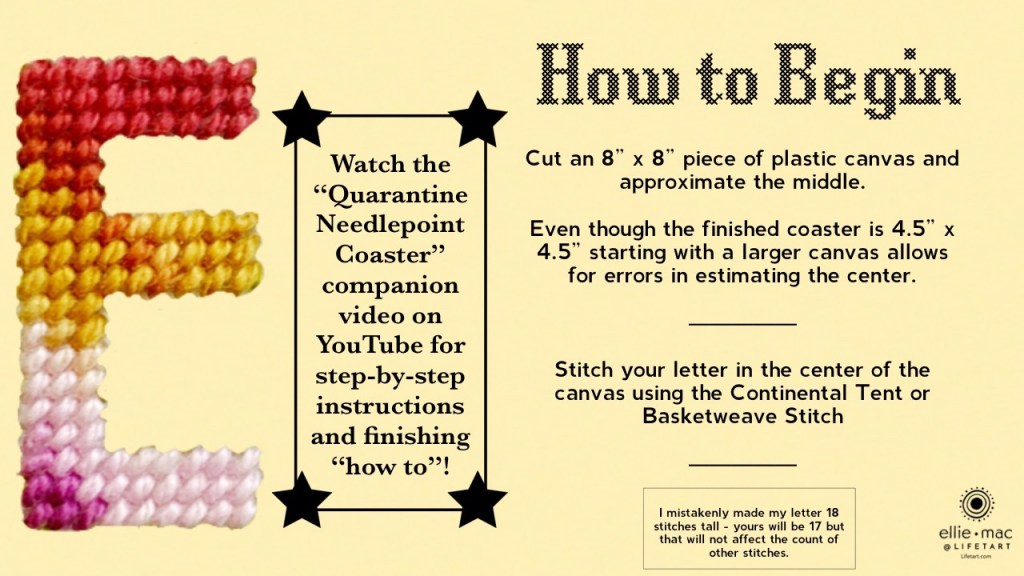
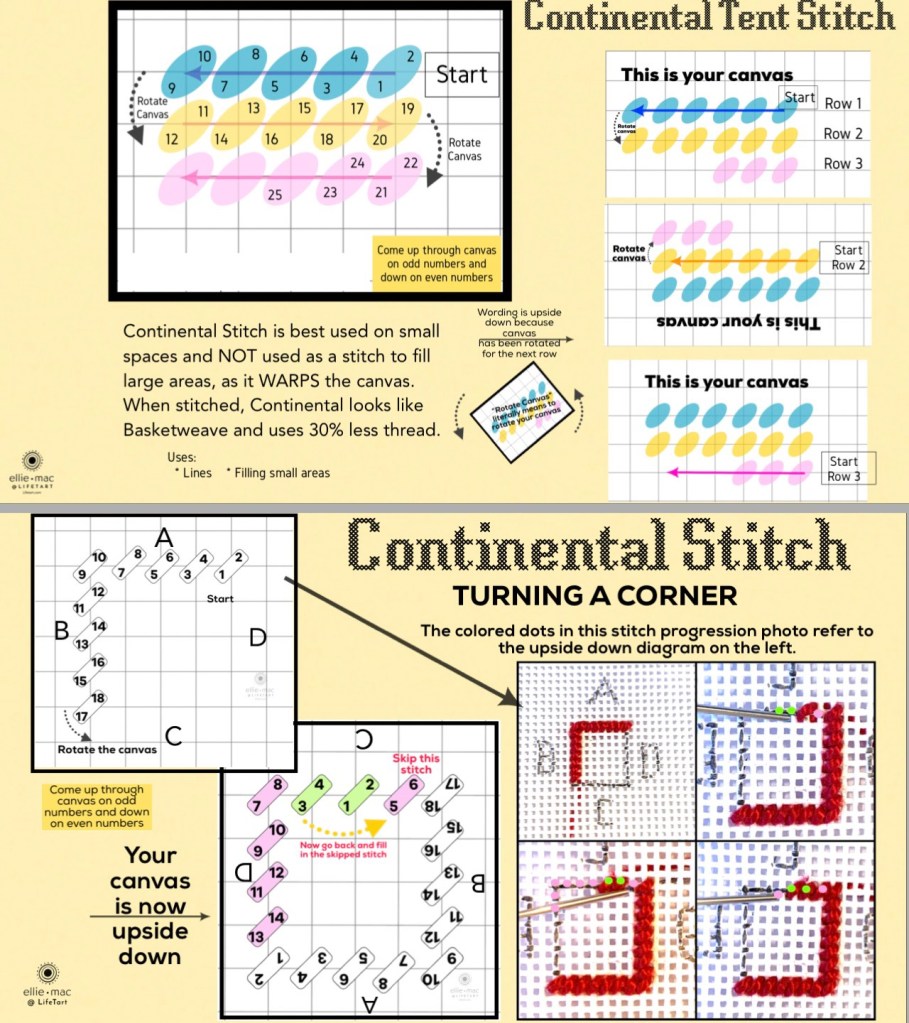
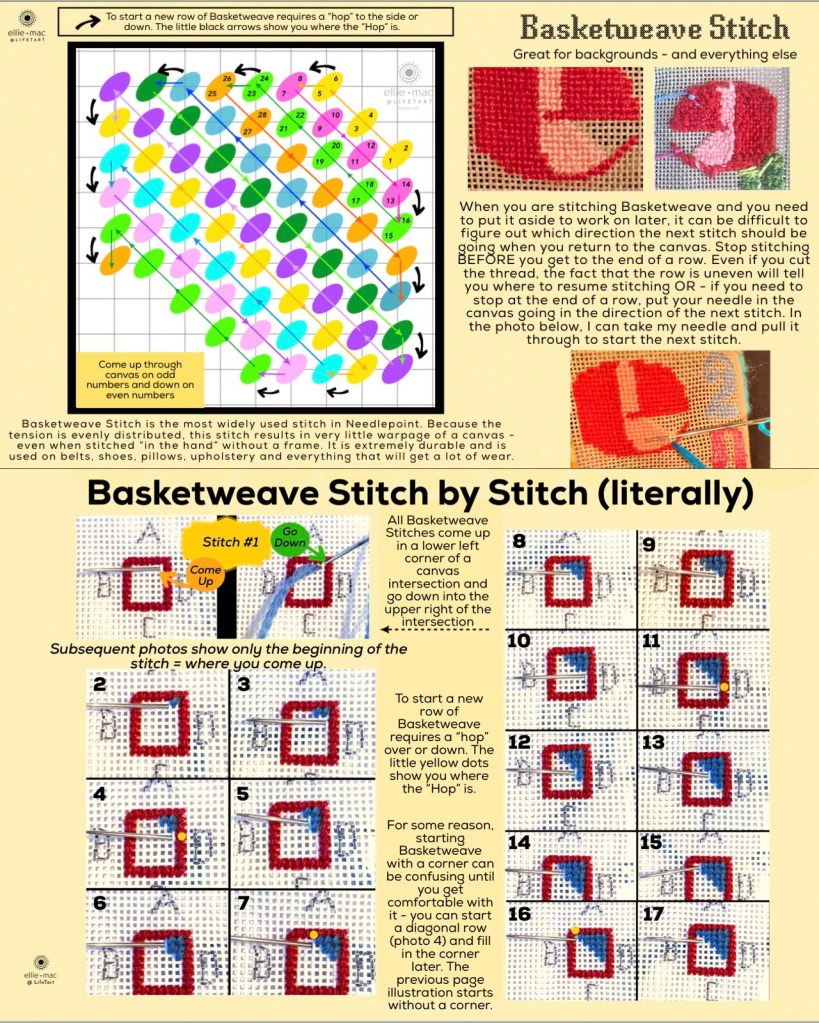
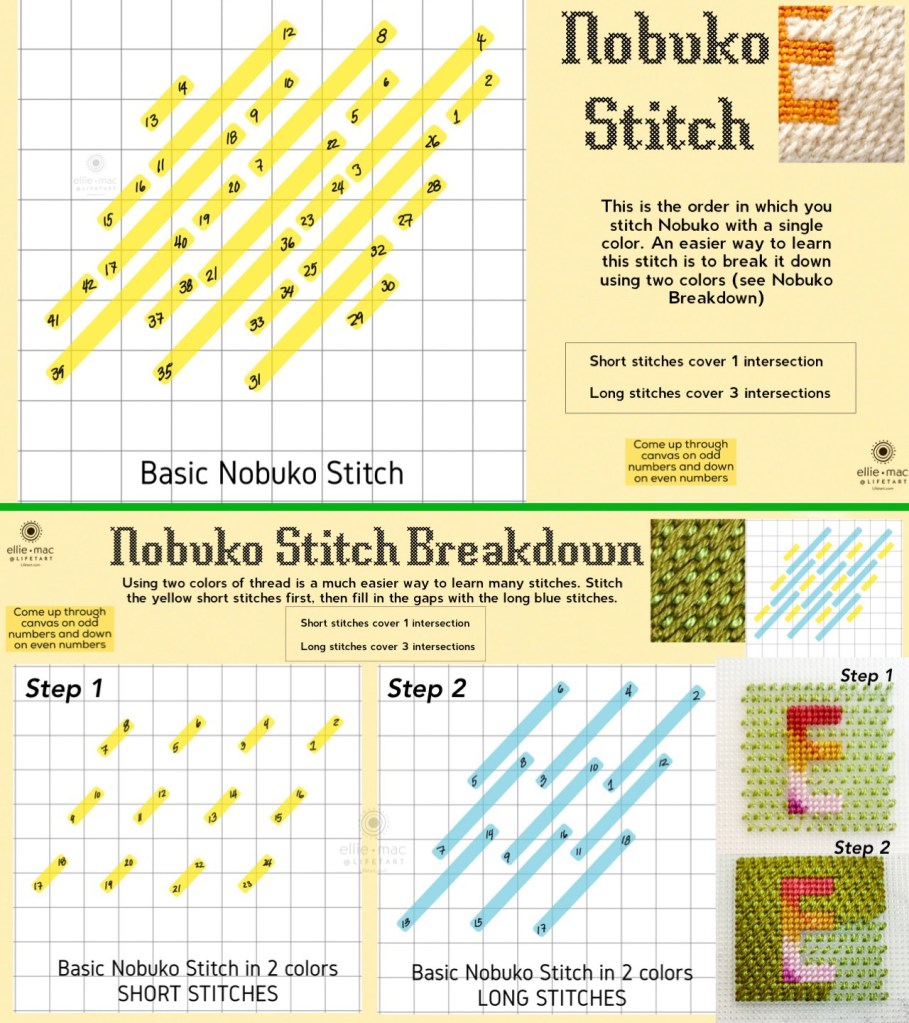
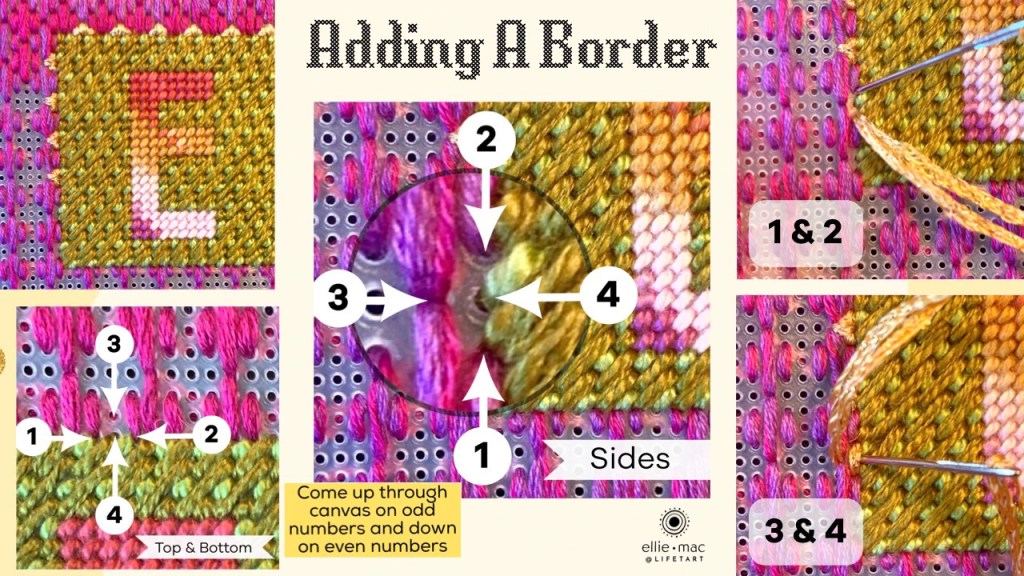
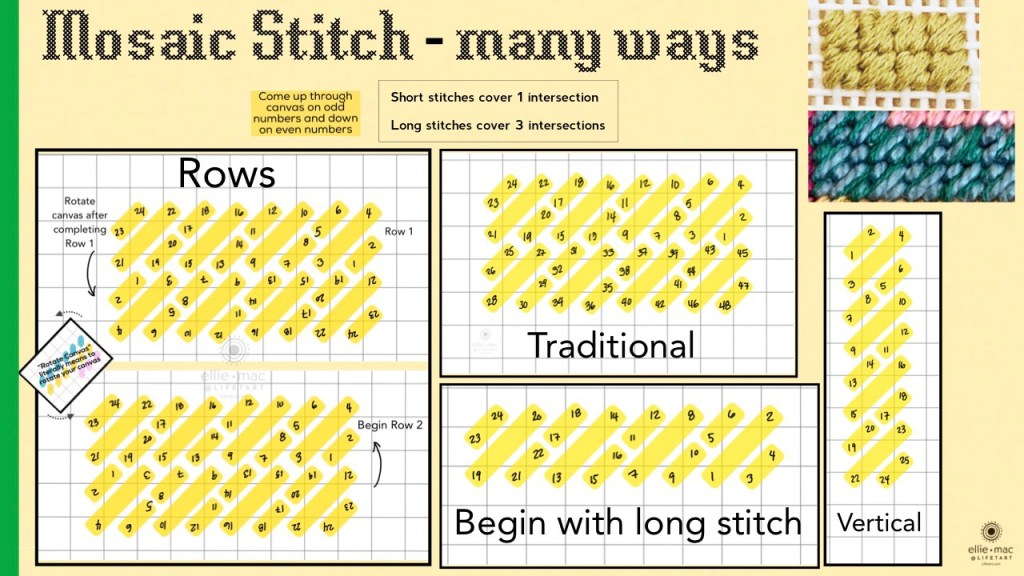
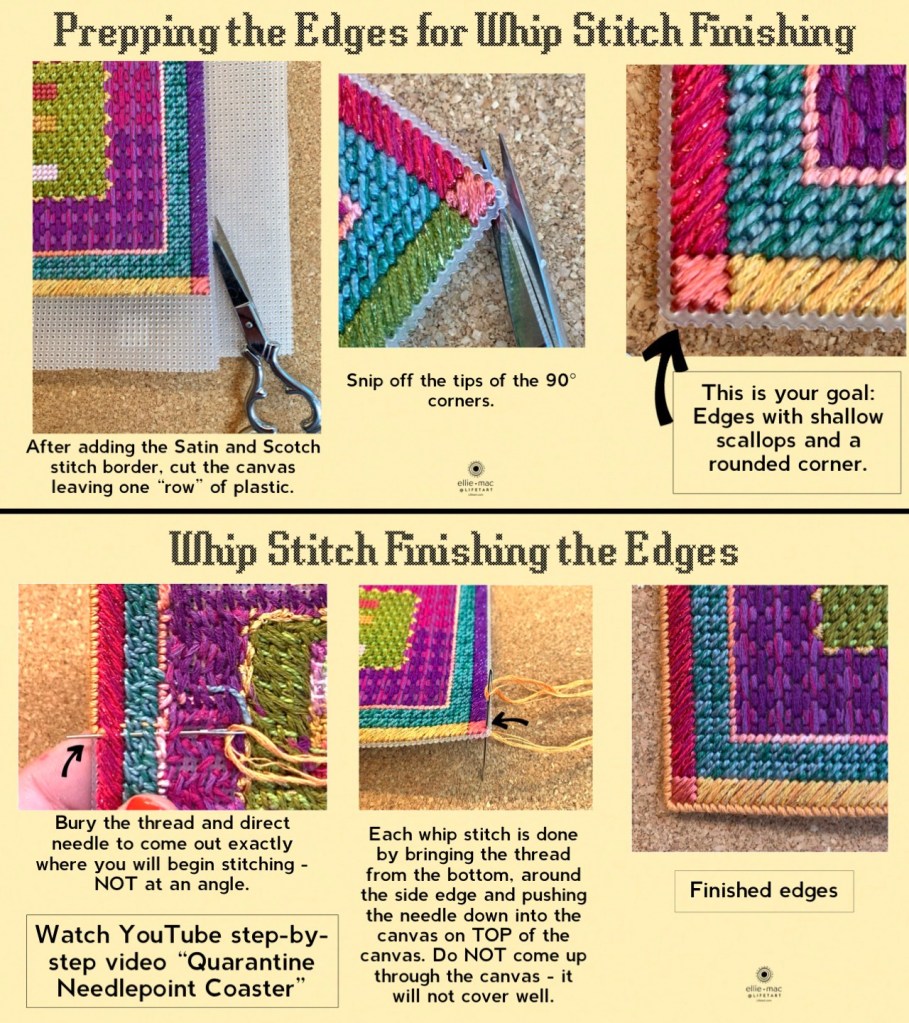
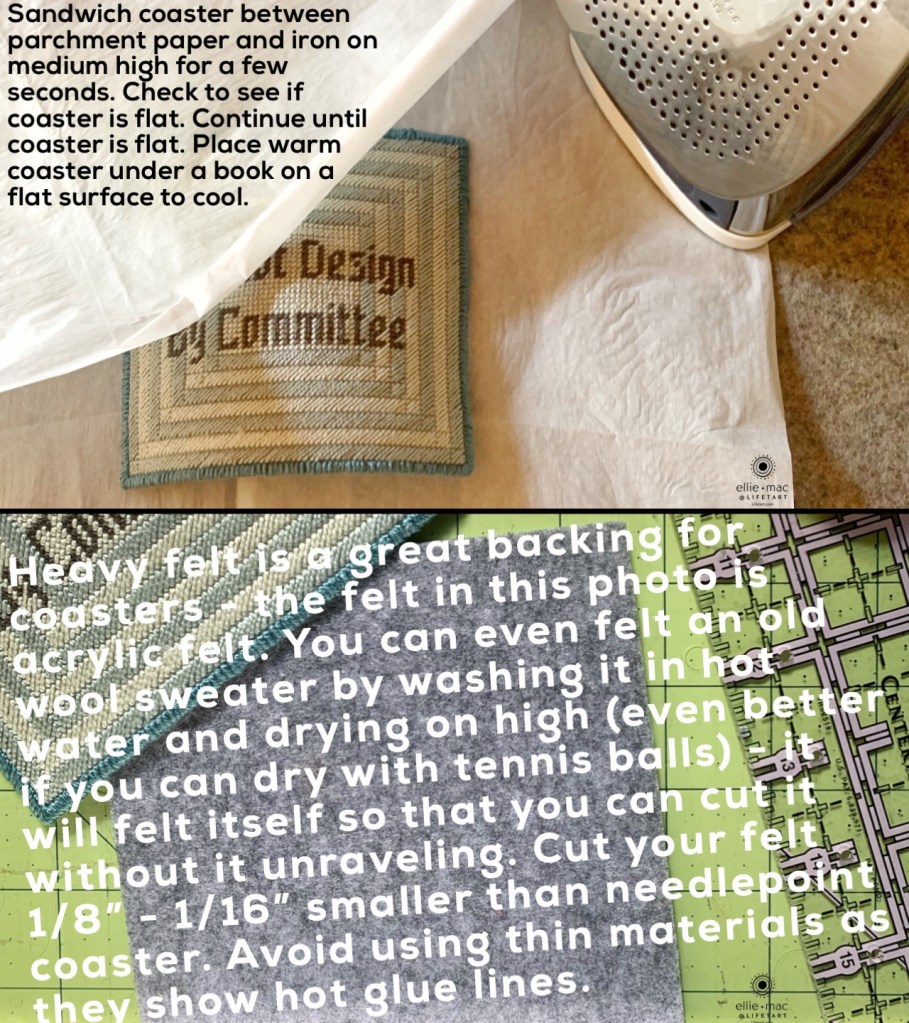
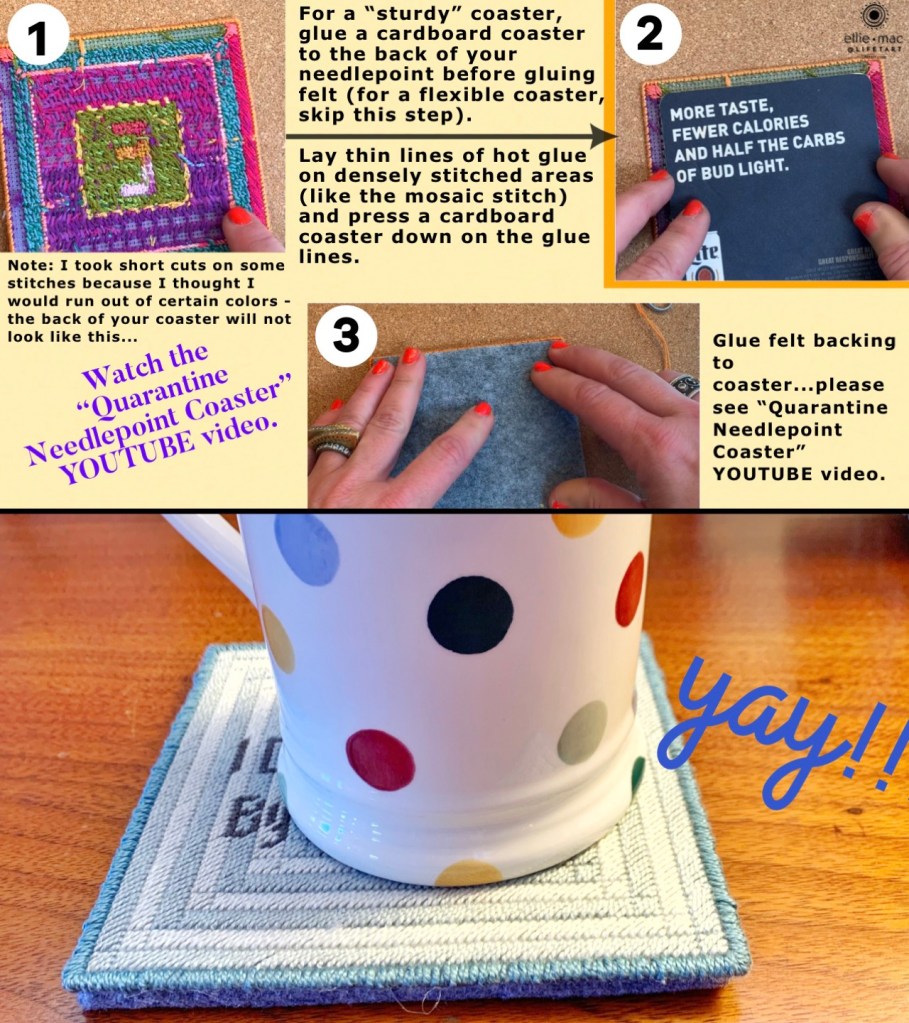
The photos below are the companion “textbook” for the video on YouTube. Be sure to watch the video so that these photos will make sense to you! I have included a “Table of Contents” – the video is 1hr 45 min so I thought it really needed a table of contents! This video covers every stitch step-by-step with all sorts of info about thread, stitches, etc. If you are a beginner, this may be of interest to you…it is intended as a quick sampler to learn all sorts of stitches and end up with a sweet little self finishing coaster. The Stitch Charts below are listed in the order they are stitched on the coaster and the order in which they appear in the video. The center colored bar that runs through the middle of the charts refers to the color of that stitch on the Master Chart.
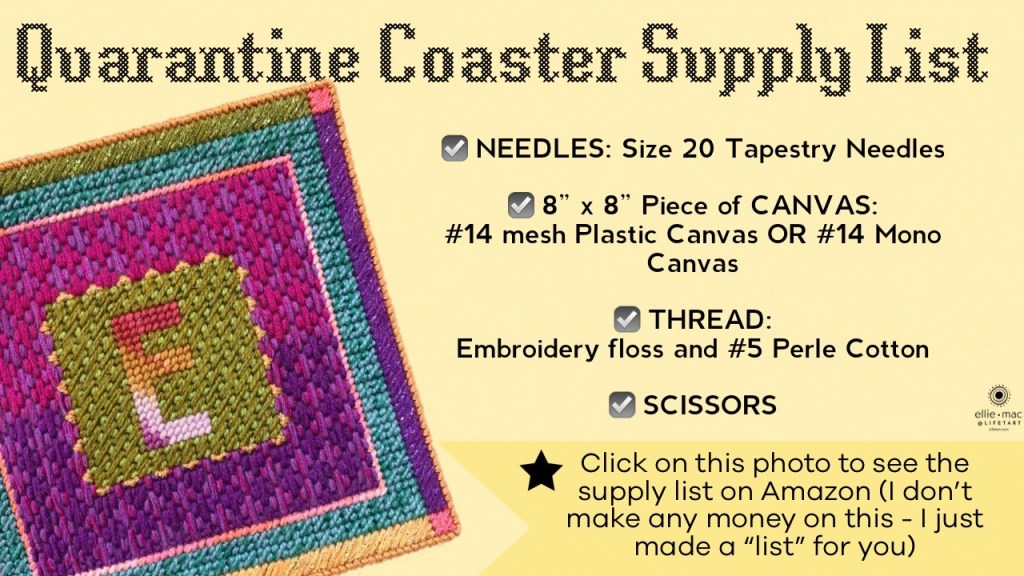
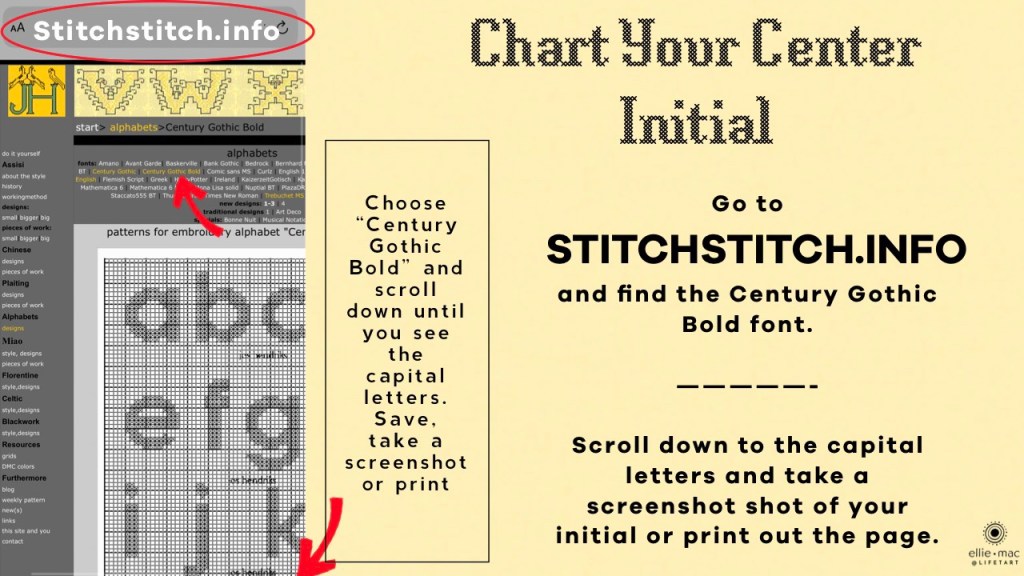
Amazon Supply List – Click on this photoUnfortunately the source for this letter chart, Jos Hendriks blog is no more – however there is a work around! Google “century gothic bold cross stitch alphabet patterns” and you will see many pics of this chart pop up as Pinterest images – just take a screenshot of one and you will have the chart ☺️Master Chart: Stitches & Yardages Mono Canvas requires 2x more thread – see starred box in photo aboveContinental Stitch = Center letter and yellow border around the Hungarian stitchBasketweave = Center letter option instead of Continental StitchBorder stitches are stitched in the gaps after adding first color of Hungarian StitchApplying felt to the back is optional – the coaster functions perfectly without a backing.
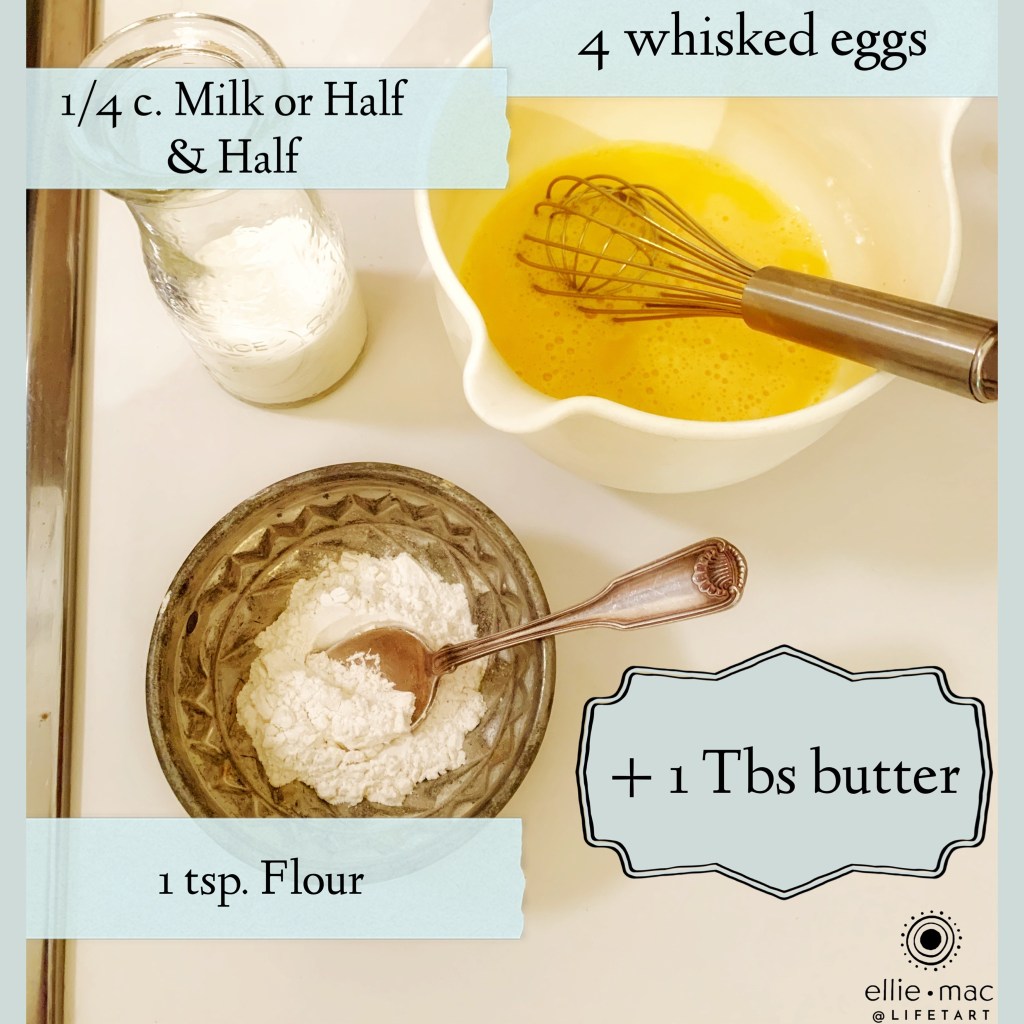
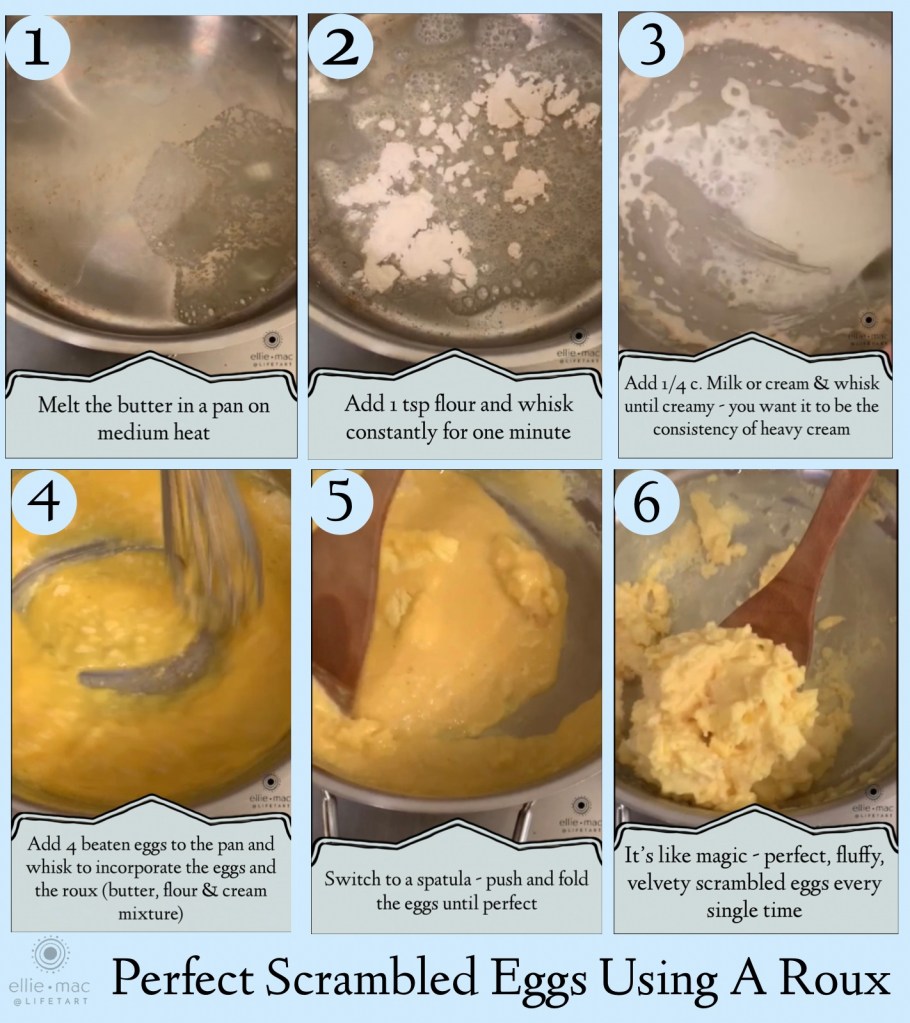
The most perfect, fluffy, velvety scrambled eggs you have ever had – every single time…the magic is the ROUX
Click on the above photo for the YouTube video
I read about this technique of using a ROUX to make scrambled eggs – I tried it because it sounded “weird” & interesting – I mean really, who ever heard of using a roux? That was about 10 years ago and I have used it ever since…it is amazing and about as close to fool proof as you will ever find.
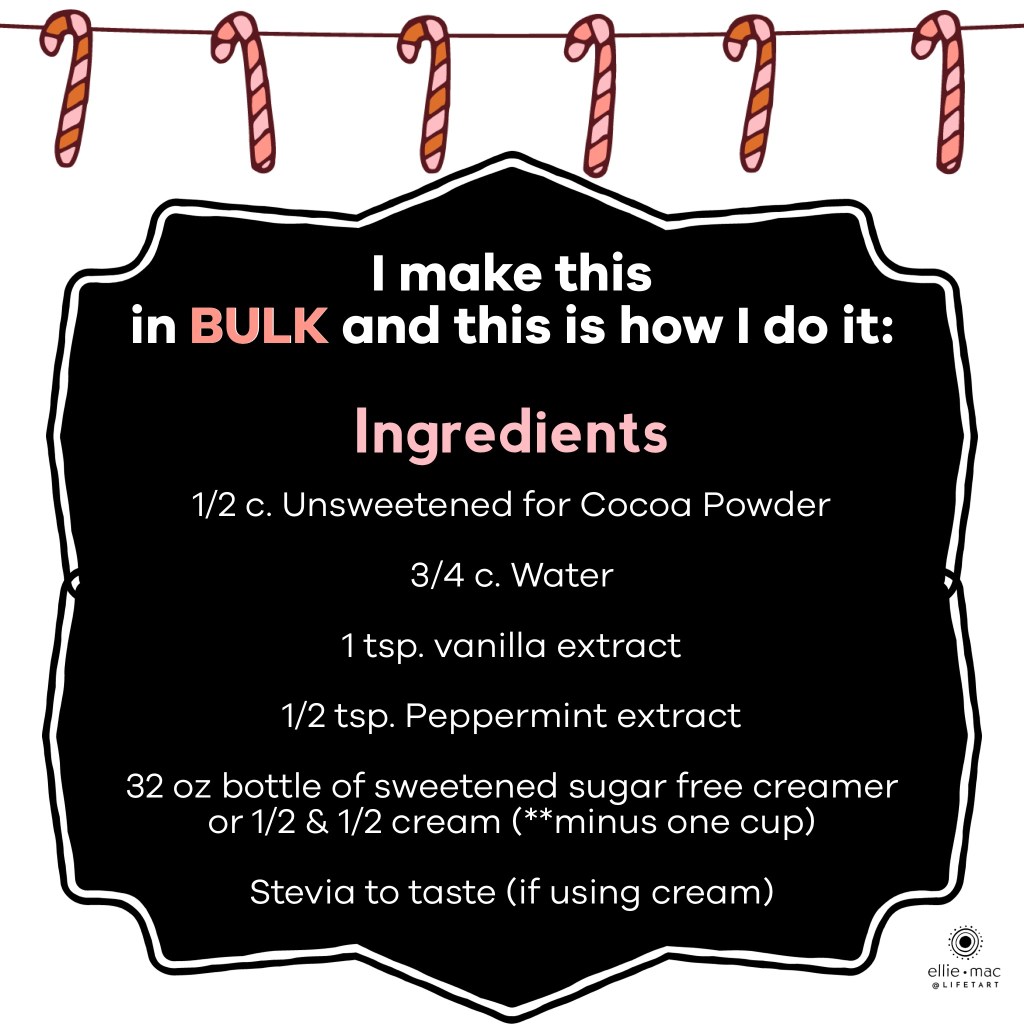
Click on the ingredients photo above for the FULL size video on IGTV
I wish I could give credit where credit is due, and tell you where I learned this but I can no longer find any reference to this technique online. This technique is so wonderful that it really needs to be passed down through generations – try it – remember it – teach it to your children & grand children so that it will live on….
Click on above photo for a link to ALL SUPPLIES on Amazon – Local Needlepoint stores can send threads to you! …but there are also threads in this supply list on Amazon if you preferClick on the above photo for the finishing videoClick on above photo to open video 🎥 on YouTube
I love my 1st generation Apple Pencil but the little “Lightning-to-Lightning adapter” sleeve that fits over the lightning charger is insanely small (about 1/2 the size of a postage stamp). This little sleeve allows you to charge the pencil with a regular charging cord – without this sleeve, you must charge your iPad, then plug the pencil into your iPad and use the battery from the iPad to charge the pencil – with the pencil sticking out of the iPad…the only way I would feel safe doing this is if I put the whole thing in the middle of my dining room table because it’s a disaster waiting to happen if anything jostles it – with the pencil charging, it measures 16” long! The paranoid side of me wonders if Apple intentionally designed it this way so that they could sell more of these little sleeves…I mean really, who could ever keep track of something this size?
I use this GearTie “Cordable”. I prefer it to the cords they sell specifically for this purpose because the side loop profile is smaller. I applied velcro to the interior spine of my iPad case (my case looks almost like a book with a 1” spine) and to my pencil – the low profile of the Cordable allows me to attach the pen to the Velcro and close the front cover flat! Yay!!!
*GearTie Cordables are available on Amazon, Home Depot, Lowe’s, etc.